I just realized all four of the A14F are installed backwards...
OK, so it took me about 2 hours to fix this major screwup. The A14Fs are back in business.
Thursday, September 24, 2009
LM323K Voltage Regulator Installation


 UPDATE: Feb.17.2010 - Please note that the A14F recitifier diodes are installed backwards in the above and below images.
I fixed this soon afterwards, before I applied power. See my later posts!

Tonite I installed the LM323K voltage regulator (5v / 3a).
A pair of magnetized wire strippers came in handy to drop the screws into place. Needle nose plyers would have worked fine too I guess. I used a tiny amount of masking tape to tape the washers to the screws so that I could drop them into place easily. The area is too tight to get your fingers into (maybe you can, but I could not).
This was a bit more frustrating than I thought it would be, but everything is now soldered into place. There are 2 insulating washers in the upper left of the image above. You do not need these insulating washers - Just bolt the LM323K as is, to ensure a good grounding connection to the PCB.
Soldering resistors and ceramic capicitors


So today I got a package in the mail from Surplus Sales.... which contained all of the carbon composite resistors (EXCEPT for the (12) 3k ohm), the ceramic caps, the 47pF capacitor, and the 100 ohm video trim potentiometer. I soldered the A14F rectifiers, the MPS transistor (video signal), the .1uF, .01uF and .001uF ceramic disc capacitors, the 47pF dipped cap, and the 14.138 Mhz crystal.
In the image at the top, you can see that I shorted the (2) "6502" bridges, as well as the No DMA bridge. I used wire that was trimmed from the resistors to short the (2) "6502" bridges.
(The No DMA short only has one hole in the PCB, not sure why?)
Anyhow, here are a couple of things that I learned tonite:
1) The MR501 rectifier diodes have wire leads that are too big for the holes in the PCB so I used A14F rectifiers instead. (A friend of mine sent me these from Ca. as I could not find them anywhere -- apparently they are only 15 cents each at the electronics shops in the Bay Area)
2) If you are working with ceramic caps with really short leads, make sure that you tape them to the PCB before you solder them. Otherwise they might fall out when you turn the board over. And if they do fall out *while you are soldering*, as did for me, you will be swearing for the next 15 minutes trying to get the solder out of the holes so that you can start over. Luckily, it only happened once. I didn't have much luck removing the solder using copper braid. So I ended up using a piece of trimmed resistor wire and a pair of plyers to hold the wire (so I wouldn't burn myself). I reheated the solder in the hole while plunging the resistor wire into the hole until it came loose. After a few tries I was able to remove enough solder to get the capacitor back into place AND TAPED to the PCB before attempting to solder. (I will purchase a solder sucker soon...)
3) If you use too much solder on resistors, caps and diodes, the solder will seep through to the other side and "ball up", creating small BB like balls of solder on the top of the PCB. (Maybe my iron is a little hot?)
4.) I am finding that a setting of about 3.4 on my soldering iron is a good heat to work with.
I let the iron heat up for at least 5 minutes before using it.
(Model = Weller WLC100)
Tuesday, September 15, 2009


Today a package arrived from Jameco.com, more parts for the Apple 1 clone! So tonite I soldered the 1N4001 diodes (4) and the (3) voltage regulators (-12v, +12v and 5v).
My Apple 1 board stencil was not readable, so I broke out the other board I have which does have a readable stencil around the regulators, so I've included a picture.
Saturday, September 12, 2009


So today I finally took the plunge and started soldering IC sockets, diodes and axial capacitors onto my Apple 1 clone. I guess it took about 3.5 - 4 hours total. I took my time in effort not to screw up. I taped each IC socket to the front of the board with masking tape, one at a time, as I soldered them so that they were nice and flat against the circuit board. After soldering all of the IC sockets, I soldered the IN914 diodes, then the 22uF axial capacitors. Then I did the large cap, and then the (2) 2400 uF caps.
Note the 11000uF 25v capacitor to replace the impossible to find 5300uF cap. ( Tip from a former Apple Engineer )
Monday, September 7, 2009
Interview with Monroe Postman, Original Apple 1 owner
Monroe Postman Interview
=======================
Sep.2009
Hello everyone, I am here speaking with Monroe Postman, one of the few owners of the original Apple 1 computer.
Hi Monroe, can you tell us about your background, and what sparked your interest in computing?
I got my Bachelor of Electrical Engineering (BEE) before schools were offering Computers as a Major. My long term interest in computers turned professional when I joined the UNIVAC 1 staff at New York University in the early 1950s, which led eventually to a career in designing digital computers. I also taught microprocessor equipment design in the 1970s under a National Science Foundation grant.
What can you tell us about your experience as a HomeBrew Computer Club member?
I attended The Homebrew club after it started meeting at the Stanford Linear Accelerator (SLAC) and stayed until it left that venue. I was not an "active participant;" I just listened with rapt attention as the revolution got under way.
Is it true the Lee Felsenstein thought he was in charge, but wasn't really?
Was it a free for all?
My recollection was that Lee did keep order, but wasn't "bossy." There were at least 100 people at a typical meeting, but it was hardly a free for all. And there were plenty of disagreements, but the atmosphere was generally civil.
Did you ever get to meet Steve Wozniak? If so, what can you tell us about that encounter?
I only met Steve Wozniak briefly, years later, when I asked him to sign my Apple 1, I believe at the Computer History Museum in Mountain View. He was very cordial.
Did you ever see Woz demo the original Apple at the club?
Yes, I recall seeing a demo in the lobby of SLAC. I think that he was also at the First West Coast Computer Faire held in 1977 in San Francisco. That was very exciting!
Where and when did you purchase your Apple 1?
I bought it at an estate sale, in around 1980.
What made you decide to put your Apple 1 up for sale?
I guess as a collector, my interests have evolved over time. And there are so few of these Apple 1s out there, it’s time for someone else to enjoy it.
If you could give any bit of advice to people just getting into computers, who might be interested in either software programming or hardware design what would you tell them?
I've been a hardware engineer, using a bit of programming or machine code to modify and test my designs. If I were just entering graduate school, this time I would opt to study bio-engineering which is an exciting mix of many engineering disciplines. Every engineer should know which end of a soldering iron is hot! I know that is so 20th century . . .
It seems we’re always at the end of one exciting era in the history of computers and at the beginning of another. Leave it to Apple with the iPhone to have introduced one of today’s most interesting computing platforms, with wifi, location awareness, color touch screen, video and all of its other features it is changing the way people compute.
In my own life, I have recently been working at the Department of Veterans Affairs, using sensors, hydraulics and computer control to build solutions that provide rehabilitation and assistance to stroke victims, paraplegics and quadriplegics.
Monroe, thank you very much for your time, it has been a great pleasure.
Please visit: http://apple1forsale.com
Saturday, August 29, 2009
An Apple 1 will soon to be for sale...


Please visit: http://apple1forsale.com
Newsflash: This Apple 1, (number 49 sticker on back) SOLD on Oct 3rd, 2009 in the middle of the night, not too long after being posted to ebay!
Apple 1 ROM sets - 3 left
Apple 1 ROMs for sale. I have 3 sets left.
(1 set = A1, A2, A3, A4)
I am dropping the price to $40 USD which was pretty much my cost.
I am dropping the price to $40 USD which was pretty much my cost.
(In fact, they were $10.00 per chip in 1977! Same price today.)
These are all ceramic DIP 6301-1J chips.
I accept PayPal.
I accept PayPal.
Tuesday, April 28, 2009
Apple 1 Interface Age October 1976


 Apple 1 ads first appeared in the October 1976 issue of Interface Age magazine.
(Hmmm... or did the ad first appear as text only, in the September 76 issue?)
"Apple Introduces the First Low Cost Microcomputer System with a Video Terminal and 8K Bytes of RAM on a Single PC Card"
UPDATE FEB.10.2010: It turns out that the September 1976 issue of Interface Age is where the first Ad for the Apple-1 appeared, not the October issue. I will have images on the way soon. Stay tuned!


Monday, April 27, 2009
Apple 1 Motherboard Hi-Res scans
I paid a visit to Kinko's today for hi-res motherboard scans (no components installed).
Others have asked for them, so here they are:
http://home.roadrunner.com/~shipcove/apple/apple_1_scans.pdf
This is a single PDF with images of both the front and back of the motherboard.
Here are 2 HiRes images, front and back of an original Apple 1. I don't remember where I found these...
Front of PCB
Back of PCB
Monday, April 13, 2009
Apple 1 Repro with GI 2513 character generator
 This reproduction board (image source: bytecollector.com) is using the GI 2513 character generator which is a +5 volt IC (instead of the original 2513 which used 3 voltages +5, -12, -5). The GI 2513 is a drop-in replacement for the old Signetics 2513. I have a handful of these chips if anyone needs one... drop me a mail (servobit AT maine DOT rr DOT com)
Saturday, April 11, 2009


Wednesday, April 8, 2009
Apple 1 ROM sets for sale 6301-1J (A1, A2, A3, A4)

UPDATE: July 30 2012 -- Sold out.
I have a few "sets" of Apple 1 ROMs available for anyone who purchased the Obtronix Apple 1 reproduction but didn't get the components. (I have 1 board without components) -- or for anyone who needs replacement chips for the original Apple 1.
Each set consists of 4 chips: 6301-1J ceramic.
A1 and A2 are the ROMs for the motherboard.
A3 and A4 are the ROMs for the cassette interface (which is a different board)
These were very hard to find, and expensive to have programmed.
I am selling each set for
50.00 USD
$40.00 USD
Please send me a message:
servobit AT maine DOT rr DOT com
Paypal ok.
John
Saturday, March 28, 2009


Obtronix Instructions for Apple 1 Reproduction
Apple 1 Assembly Hints and Tips
(Note (X-Y) refers to location Row-Column silkscreened on board)
The Apple 1 is pretty easy to construct. All the part names are silk-screened directly on the printed circuit board. For the most part, just stuff the board with components and solder, apply a few jumpers, hook up the keyboard, monitor and transformers and away you go. Here are a few tips.
1. First verify the kit is not missing any parts. A part list is included, although every attempt was made to ensure all parts were included, sometimes mistakes are made, please email obtronix@yahoo.com for quick replacements.
2. Begin by installing and soldering all IC sockets (if used, IC sockets are not included in some kits kit), the two Molex type connectors (the white ones ) and expansion connector (the big green one).
3. Install LM-323 (D-18) regulator and heatsink. First screw LM-323 + thermal pad(clear plastic included in mounting kit) and heatsink to board, then solder leads. Do not use the nut insulators included in the mounting kit, as the case of the LM-323 must be grounded to the board ground for the power supply to work.
4. Install three TO-220 regulators (D-16), looking at the board face on, the first regulator, positive 12V, is installed with the part number printing facing you, the second two regulators, negative 12 and 5, are installed backwards, with the part number printing facing toward the back of the board.
5. Solder all resistors, caps, diodes and crystal. Part values and orientation guides are silkscreened on the board. The 1uF silkscreened parts # are actually installed with .1uF caps, as on the original Apple computer.
6. Install Spectrol 100 ohm trim pot (D-1), there are three pins on this part, install with the middle pin facing away from you.
7. Install Motorola 3704 transistor (D-1) , follow the orientation silkscreened on the board.
8. If using sockets, install the chips, otherwise solder all chips to the board.
9. Check the board for empty parts, all parts should now be installed.
10. Short option jumpers with a big glob of solder or a small bare piece of wire
* Short two 6502 jumpers (A-5,A-8)
* Short No DMA jumper (A-9)
11. Short Memory map jumpers (B-9,B-10). The below options are the most popular and enables you to use Apple 1 basic and the cassette interface. Use a small thin wire with insulation, otherwise they will short out.
* Short Y to F, Z to D, R to C, W to E and X to 0
12. Mount Board on plywood using 5 standoffs (one in each corner and in the middle of the board)
13. Your Apple 1 motherboard is complete. Hook up the keyboard, power, clear screen and reset switches, and monitor per the schematics.
14. Power up tips
* After powering up you will need to trim the 100 ohm trim pot to obtain a clear image on the screen.
* The Apple has no power on reset circuitry, in that it doesn't come up running, first push the clear screen button and then the reset key, a cursor should now appear.
15. Debug hints, if the Apple is not working check the following
* First check the power rails for proper voltage
* Check clock input
* Check to make sure there are no solder bridges
* If using sockets make sure all pins are firmly in the socket.
* If the Apple is up and running but it is not responding correctly to monitor commands, it most likely is a bad DRAM chip or DRAM chip connection, try swapping the X DRAMS with the Y DRAMS, the monitor code uses the X DRAMS only.
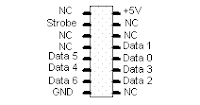
* If a Keyboard is included in the kit, the pinout is (note remove conductive tape from back of keyboard before powering up)
(Note (X-Y) refers to location Row-Column silkscreened on board)
The Apple 1 is pretty easy to construct. All the part names are silk-screened directly on the printed circuit board. For the most part, just stuff the board with components and solder, apply a few jumpers, hook up the keyboard, monitor and transformers and away you go. Here are a few tips.
1. First verify the kit is not missing any parts. A part list is included, although every attempt was made to ensure all parts were included, sometimes mistakes are made, please email obtronix@yahoo.com for quick replacements.
2. Begin by installing and soldering all IC sockets (if used, IC sockets are not included in some kits kit), the two Molex type connectors (the white ones ) and expansion connector (the big green one).
3. Install LM-323 (D-18) regulator and heatsink. First screw LM-323 + thermal pad(clear plastic included in mounting kit) and heatsink to board, then solder leads. Do not use the nut insulators included in the mounting kit, as the case of the LM-323 must be grounded to the board ground for the power supply to work.
4. Install three TO-220 regulators (D-16), looking at the board face on, the first regulator, positive 12V, is installed with the part number printing facing you, the second two regulators, negative 12 and 5, are installed backwards, with the part number printing facing toward the back of the board.
5. Solder all resistors, caps, diodes and crystal. Part values and orientation guides are silkscreened on the board. The 1uF silkscreened parts # are actually installed with .1uF caps, as on the original Apple computer.
6. Install Spectrol 100 ohm trim pot (D-1), there are three pins on this part, install with the middle pin facing away from you.
7. Install Motorola 3704 transistor (D-1) , follow the orientation silkscreened on the board.
8. If using sockets, install the chips, otherwise solder all chips to the board.
9. Check the board for empty parts, all parts should now be installed.
10. Short option jumpers with a big glob of solder or a small bare piece of wire
* Short two 6502 jumpers (A-5,A-8)
* Short No DMA jumper (A-9)
11. Short Memory map jumpers (B-9,B-10). The below options are the most popular and enables you to use Apple 1 basic and the cassette interface. Use a small thin wire with insulation, otherwise they will short out.
* Short Y to F, Z to D, R to C, W to E and X to 0
12. Mount Board on plywood using 5 standoffs (one in each corner and in the middle of the board)
13. Your Apple 1 motherboard is complete. Hook up the keyboard, power, clear screen and reset switches, and monitor per the schematics.
14. Power up tips
* After powering up you will need to trim the 100 ohm trim pot to obtain a clear image on the screen.
* The Apple has no power on reset circuitry, in that it doesn't come up running, first push the clear screen button and then the reset key, a cursor should now appear.
15. Debug hints, if the Apple is not working check the following
* First check the power rails for proper voltage
* Check clock input
* Check to make sure there are no solder bridges
* If using sockets make sure all pins are firmly in the socket.
* If the Apple is up and running but it is not responding correctly to monitor commands, it most likely is a bad DRAM chip or DRAM chip connection, try swapping the X DRAMS with the Y DRAMS, the monitor code uses the X DRAMS only.
* If a Keyboard is included in the kit, the pinout is (note remove conductive tape from back of keyboard before powering up)


Inside the Motorola 6820/1 PIA
(Peripheral Interface Adaptor)
Originally published on September 18th, 1999 in the Usenet newsgroup: Rec.Games.Pinball
Functional Overview
The 6820/1 PIA can be classed as two seperate 8-bit ports with interrupt generating pins in one device. A two "channel" device if you like.
Each channel has an 8-bit (byte wide) port and any of those 8 port pins can be configured as an input or output in any configuration. The ports are refered to as "port A" and "port B". The interrupt generating pins are CA1 and CA2 for port A and CB1, CB2 for port B. These are inputs on the the other side of the PIA (to the "outside world" - not the processor bus side). Cx1 is *always* an interrupt input pin, Cx2 can be either an interrupt generating pin or a basic output pin as per the ports.
Any state change received on the Cxx pins appear on the IRQ (Interrupt ReQuest) pins on the bus side of the PIA (providing Cx2 is set to generate interrupts). These pins - IRQa/b are tied together and also
tied to all other PIA IRQ pins in the system. This IRQ line is tied to the 680x processor with a pull-up resistor (wire OR operation). When the PIA acknowledges an interrupt on it's own Cxx pins, it sets the IRQa/b output pins low and the processor starts the IRQ service routine.
The PIA also has three Chip Select pins (CSx) which bring the PIA out of standby or "tri-state" operation via address decoding. In it's tri-state, the data bus lines are high impedance - virtually open circuit so
that they do not present any weight or draw current from the processor data bus whilst it's carrying out other system hardware operations. The IRQa/b output pins and the port sides/Cxx pins remain active even during tri-state operation so that they can still assert IRQs or acknowledge incomming data on the port side.
There are also two Register Select pins (RS0/1) and these two bits determine which of the internal six registers are being read from or written too. However, you don't need to be a rocket scientist to work
out that you can't address six registers with two bits (00,01,10,11 = 4 address combinations). So to understand how the PIA works - you need to look inside:
RS0/1 Register Select Bits
1 0 (Register select bits 1-0)
0 0 Peripheral Register A: Actual port data bits/pins
0 0 Data Direction Reg. A: Sets I/O for each pin. 0=input, 1=output.
The first thing you see here as that both registers share the same address. You determine which register you want to access by setting bit 2 of the "control" register. A "control" register exists for each
port...
0 1 Control Register A:
|bit7|bit6|bit5|bit4|bit3|bit2|bit1|bit0|
| | | | | | |_____|
| | | | | | |
| | | | | | '-- CA1 control (set-up)
| | | | | '-- =0 Direction. =1 Port itself/Periph. A
| | '----'----'--- CA2 control (set-up)
| '--- (read only) Interrupt via CA2 (if set to gen. interrupts)
'--- (read only) Interrupt via CA1
Bits 0-5 can be written too and read by the processor but the IRQ bits (6 and 7) are set by the PIA internally and the processor reads these two bits to determine which CAx pin asserted the interrupt and the appropriate action is then taken. The processor cannot write to bits 6 and 7. When the PIA sets bit 6 or 7 to "1" - it will lower the appropriate IRQa/b output pin, but since they're both tied together -
they both go low. The PIA will clear bit 6 and 7 itself after the processor has read the control port, ready for the next interrupt.
Port B has exactly the same configuration but substisute "B" for "A" and "2" for "1" on the CA/B inputs...
1 0 Peripheral Register B: Actual port data bits/pins
1 0 Data Direction Reg. B: Sets I/O for each pin. 0=input, 1=output.
1 1 Control Register B: Sets CBx config. Port Register access etc.
...so that's your register addressing taken care of.
Out of reset. The PIA will always configure itself to both ports being inputs and all interrupts disabled. The processor has to reconfigure this for proper in-game operation.
So if you were to set up port A using 6800/2/8 assembly, it would look like this (for example):
A_direct equ $2000
A_data equ $2000
A_cntrl equ $2001
Init_pia:
clr A_cntrl ;access port A direction register (bit2=0)
ldaa #$0f ;upper 4 bits=input, lower 4 bits=output
staa A_direct ;set them.
tab ;accumulator B=accumulator A
ldaa #$04 ;now access the...
staa A_cntrl ;...data port iself
stab A_data ;set outputs (lower 4 lines PA0/3 high out)
... ;set port B...
...
The set-up and programming of the PIA depends on it's function. For instance, port "A" may set to all outputs and each bit individually set high in sequence to sweep the switch matrix. Port "B"" may be
configured as all inputs to read the returns from the matrix and the code will determine the valid switch closures and their scoring etc.
Interupt Handling
Cx2 is the only pin that can be configured as I/O. Cx1 is interrupt generating only.
Cx1 configuration
bit1 bit0 Cx1 state IRQa/b status bit7 state
---- ---- --------- ------------- ----------
0 0 High>Low Disabled (High) =1 on low transition Cx1 pin
0 1 High>Low low when bit7=1 =1 on low transition Cx1 pin
1 0 Low>High Disabled (High) =1 on High transition Cx1 pin
1 1 Low>High low when bit7=1 =1 on High transition Cx1 pin
Cx2 as Interrupt Generating
(Bit 5 cleared)
bit5 bit4 bit3 Cx2 state IRQa/b status bit6 state
---- ---- ---- --------- ------------- ----------
0 0 0 High>Low Disabled (High) =1 on low transition Cx2
0 0 1 High>Low low when bit6=1 =1 on low transition Cx2
0 1 0 Low>High Disabled (High) =1 on high transition Cx2
0 1 1 Low>High low when bit6=1 =1 on high transition Cx2
Cx2 as I/O
(Bit 5 set)
bit5 bit4 bit3 bit2 Function
---- ---- ---- ---- --------
1 0 0 0 Cx2 low after CPU reads port A data next low clock
1 0 0 1 Cx2 high when bit 7 is set (interrupt pending Cx1)
1 1 0 x Cx2 = contents of bit 3 (Cx2=output 0 this case)
1 1 1 x Cx2 = contents of bit 3 (Cx2=output 1 this case)
-- End
The 6821 Peripheral Interface Adaptor (PIA)
The PIA interfaces to the 6800 microprocessor with an 8-bit bidirectional data bus, three chip select lines, two register select lines, two interrupt request lines, a read/write line, an enable line and a reset line. To ensure proper operation with the 6800 rnicroprocessor, VMA should be used as an active part of the address decoding.
The complete 6821 data sheet is available as a PDF document.
Block Diagram of the 6821 Peripheral Interface Adaptor (PIA)
The internal registers are selected using the following table 1:
Bit 2 in each Control Register CRA-2 and CRB-2 determines selection of either a Peripheral Register or the corresponding Data Direction register, when the proper register select signals are applied to RS0 and RS1. A '1' in bit 2 position selects the Peripheral register and a '0' in the bit 2 position selects the Data Direction register.
Woz Monitor ASM
SOURCE: http://www.sbprojects.com/projects/apple1/wozmon.asm
;-------------------------------------------------------------------------
;
; The WOZ Monitor for the Apple 1
; Written by Steve Wozniak 1976
;
;-------------------------------------------------------------------------
.CR 6502
.OR $FF00
.TF WOZMON.HEX,HEX,8
;-------------------------------------------------------------------------
; Memory declaration
;-------------------------------------------------------------------------
XAML .EQ $24 Last "opened" location Low
XAMH .EQ $25 Last "opened" location High
STL .EQ $26 Store address Low
STH .EQ $27 Store address High
L .EQ $28 Hex value parsing Low
H .EQ $29 Hex value parsing High
YSAV .EQ $2A Used to see if hex value is given
MODE .EQ $2B $00=XAM, $7F=STOR, $AE=BLOCK XAM
IN .EQ $0200,$027F Input buffer
KBD .EQ $D010 PIA.A keyboard input
KBDCR .EQ $D011 PIA.A keyboard control register
DSP .EQ $D012 PIA.B display output register
DSPCR .EQ $D013 PIA.B display control register
; KBD b7..b0 are inputs, b6..b0 is ASCII input, b7 is constant high
; Programmed to respond to low to high KBD strobe
; DSP b6..b0 are outputs, b7 is input
; CB2 goes low when data is written, returns high when CB1 goes high
; Interrupts are enabled, though not used. KBD can be jumpered to IRQ,
; whereas DSP can be jumpered to NMI.
;-------------------------------------------------------------------------
; Constants
;-------------------------------------------------------------------------
BS .EQ $DF Backspace key, arrow left key
CR .EQ $8D Carriage Return
ESC .EQ $9B ESC key
PROMPT .EQ "\" Prompt character
;-------------------------------------------------------------------------
; Let's get started
;
; Remark the RESET routine is only to be entered by asserting the RESET
; line of the system. This ensures that the data direction registers
; are selected.
;-------------------------------------------------------------------------
RESET CLD Clear decimal arithmetic mode
CLI
LDY #%0111.1111 Mask for DSP data direction reg
STY DSP (DDR mode is assumed after reset)
LDA #%1010.0111 KBD and DSP control register mask
STA KBDCR Enable interrupts, set CA1, CB1 for
STA DSPCR positive edge sense/output mode.
; Program falls through to the GETLINE routine to save some program bytes
; Please note that Y still holds $7F, which will cause an automatic Escape
;-------------------------------------------------------------------------
; The GETLINE process
;-------------------------------------------------------------------------
NOTCR CMP #BS Backspace key?
BEQ BACKSPACE Yes
CMP #ESC ESC?
BEQ ESCAPE Yes
INY Advance text index
BPL NEXTCHAR Auto ESC if line longer than 127
ESCAPE LDA #PROMPT Print prompt character
JSR ECHO Output it.
GETLINE LDA #CR Send CR
JSR ECHO
LDY #0+1 Start a new input line
BACKSPACE DEY Backup text index
BMI GETLINE Oops, line's empty, reinitialize
NEXTCHAR LDA KBDCR Wait for key press
BPL NEXTCHAR No key yet!
LDA KBD Load character. B7 should be '1'
STA IN,Y Add to text buffer
JSR ECHO Display character
CMP #CR
BNE NOTCR It's not CR!
; Line received, now let's parse it
LDY #-1 Reset text index
LDA #0 Default mode is XAM
TAX X=0
SETSTOR ASL Leaves $7B if setting STOR mode
SETMODE STA MODE Set mode flags
BLSKIP INY Advance text index
NEXTITEM LDA IN,Y Get character
CMP #CR
BEQ GETLINE We're done if it's CR!
CMP #"."
BCC BLSKIP Ignore everything below "."!
BEQ SETMODE Set BLOCK XAM mode ("." = $AE)
CMP #":"
BEQ SETSTOR Set STOR mode! $BA will become $7B
CMP #"R"
BEQ RUN Run the program! Forget the rest
STX L Clear input value (X=0)
STX H
STY YSAV Save Y for comparison
; Here we're trying to parse a new hex value
NEXTHEX LDA IN,Y Get character for hex test
EOR #$B0 Map digits to 0-9
CMP #9+1 Is it a decimal digit?
BCC DIG Yes!
ADC #$88 Map letter "A"-"F" to $FA-FF
CMP #$FA Hex letter?
BCC NOTHEX No! Character not hex
DIG ASL
ASL Hex digit to MSD of A
ASL
ASL
LDX #4 Shift count
HEXSHIFT ASL Hex digit left, MSB to carry
ROL L Rotate into LSD
ROL H Rotate into MSD's
DEX Done 4 shifts?
BNE HEXSHIFT No, loop
INY Advance text index
BNE NEXTHEX Always taken
NOTHEX CPY YSAV Was at least 1 hex digit given?
BEQ ESCAPE No! Ignore all, start from scratch
BIT MODE Test MODE byte
BVC NOTSTOR B6=0 is STOR, 1 is XAM or BLOCK XAM
; STOR mode, save LSD of new hex byte
LDA L LSD's of hex data
STA (STL,X) Store current 'store index'(X=0)
INC STL Increment store index.
BNE NEXTITEM No carry!
INC STH Add carry to 'store index' high
TONEXTITEM JMP NEXTITEM Get next command item.
;-------------------------------------------------------------------------
; RUN user's program from last opened location
;-------------------------------------------------------------------------
RUN JMP (XAML) Run user's program
;-------------------------------------------------------------------------
; We're not in Store mode
;-------------------------------------------------------------------------
NOTSTOR BMI XAMNEXT B7 = 0 for XAM, 1 for BLOCK XAM
; We're in XAM mode now
LDX #2 Copy 2 bytes
SETADR LDA L-1,X Copy hex data to
STA STL-1,X 'store index'
STA XAML-1,X and to 'XAM index'
DEX Next of 2 bytes
BNE SETADR Loop unless X = 0
; Print address and data from this address, fall through next BNE.
NXTPRNT BNE PRDATA NE means no address to print
LDA #CR Print CR first
JSR ECHO
LDA XAMH Output high-order byte of address
JSR PRBYTE
LDA XAML Output low-order byte of address
JSR PRBYTE
LDA #":" Print colon
JSR ECHO
PRDATA LDA #" " Print space
JSR ECHO
LDA (XAML,X) Get data from address (X=0)
JSR PRBYTE Output it in hex format
XAMNEXT STX MODE 0 -> MODE (XAM mode).
LDA XAML See if there's more to print
CMP L
LDA XAMH
SBC H
BCS TONEXTITEM Not less! No more data to output
INC XAML Increment 'examine index'
BNE MOD8CHK No carry!
INC XAMH
MOD8CHK LDA XAML If address MOD 8 = 0 start new line
AND #00.0111
BPL NXTPRNT Always taken.
;-------------------------------------------------------------------------
; Subroutine to print a byte in A in hex form (destructive)
;-------------------------------------------------------------------------
PRBYTE PHA Save A for LSD
LSR
LSR
LSR MSD to LSD position
LSR
JSR PRHEX Output hex digit
PLA Restore A
; Fall through to print hex routine
;-------------------------------------------------------------------------
; Subroutine to print a hexadecimal digit
;-------------------------------------------------------------------------
PRHEX AND #00.1111 Mask LSD for hex print
ORA #"0" Add "0"
CMP #"9"+1 Is it a decimal digit?
BCC ECHO Yes! output it
ADC #6 Add offset for letter A-F
; Fall through to print routine
;-------------------------------------------------------------------------
; Subroutine to print a character to the terminal
;-------------------------------------------------------------------------
ECHO BIT DSP DA bit (B7) cleared yet?
BMI ECHO No! Wait for display ready
STA DSP Output character. Sets DA
RTS
;-------------------------------------------------------------------------
; Vector area
;-------------------------------------------------------------------------
.DA $0000 Unused, what a pity
NMI_VEC .DA $0F00 NMI vector
RESET_VEC .DA RESET RESET vector
IRQ_VEC .DA $0000 IRQ vector
;-------------------------------------------------------------------------
.LI OFF
;-------------------------------------------------------------------------
;
; The WOZ Monitor for the Apple 1
; Written by Steve Wozniak 1976
;
;-------------------------------------------------------------------------
.CR 6502
.OR $FF00
.TF WOZMON.HEX,HEX,8
;-------------------------------------------------------------------------
; Memory declaration
;-------------------------------------------------------------------------
XAML .EQ $24 Last "opened" location Low
XAMH .EQ $25 Last "opened" location High
STL .EQ $26 Store address Low
STH .EQ $27 Store address High
L .EQ $28 Hex value parsing Low
H .EQ $29 Hex value parsing High
YSAV .EQ $2A Used to see if hex value is given
MODE .EQ $2B $00=XAM, $7F=STOR, $AE=BLOCK XAM
IN .EQ $0200,$027F Input buffer
KBD .EQ $D010 PIA.A keyboard input
KBDCR .EQ $D011 PIA.A keyboard control register
DSP .EQ $D012 PIA.B display output register
DSPCR .EQ $D013 PIA.B display control register
; KBD b7..b0 are inputs, b6..b0 is ASCII input, b7 is constant high
; Programmed to respond to low to high KBD strobe
; DSP b6..b0 are outputs, b7 is input
; CB2 goes low when data is written, returns high when CB1 goes high
; Interrupts are enabled, though not used. KBD can be jumpered to IRQ,
; whereas DSP can be jumpered to NMI.
;-------------------------------------------------------------------------
; Constants
;-------------------------------------------------------------------------
BS .EQ $DF Backspace key, arrow left key
CR .EQ $8D Carriage Return
ESC .EQ $9B ESC key
PROMPT .EQ "\" Prompt character
;-------------------------------------------------------------------------
; Let's get started
;
; Remark the RESET routine is only to be entered by asserting the RESET
; line of the system. This ensures that the data direction registers
; are selected.
;-------------------------------------------------------------------------
RESET CLD Clear decimal arithmetic mode
CLI
LDY #%0111.1111 Mask for DSP data direction reg
STY DSP (DDR mode is assumed after reset)
LDA #%1010.0111 KBD and DSP control register mask
STA KBDCR Enable interrupts, set CA1, CB1 for
STA DSPCR positive edge sense/output mode.
; Program falls through to the GETLINE routine to save some program bytes
; Please note that Y still holds $7F, which will cause an automatic Escape
;-------------------------------------------------------------------------
; The GETLINE process
;-------------------------------------------------------------------------
NOTCR CMP #BS Backspace key?
BEQ BACKSPACE Yes
CMP #ESC ESC?
BEQ ESCAPE Yes
INY Advance text index
BPL NEXTCHAR Auto ESC if line longer than 127
ESCAPE LDA #PROMPT Print prompt character
JSR ECHO Output it.
GETLINE LDA #CR Send CR
JSR ECHO
LDY #0+1 Start a new input line
BACKSPACE DEY Backup text index
BMI GETLINE Oops, line's empty, reinitialize
NEXTCHAR LDA KBDCR Wait for key press
BPL NEXTCHAR No key yet!
LDA KBD Load character. B7 should be '1'
STA IN,Y Add to text buffer
JSR ECHO Display character
CMP #CR
BNE NOTCR It's not CR!
; Line received, now let's parse it
LDY #-1 Reset text index
LDA #0 Default mode is XAM
TAX X=0
SETSTOR ASL Leaves $7B if setting STOR mode
SETMODE STA MODE Set mode flags
BLSKIP INY Advance text index
NEXTITEM LDA IN,Y Get character
CMP #CR
BEQ GETLINE We're done if it's CR!
CMP #"."
BCC BLSKIP Ignore everything below "."!
BEQ SETMODE Set BLOCK XAM mode ("." = $AE)
CMP #":"
BEQ SETSTOR Set STOR mode! $BA will become $7B
CMP #"R"
BEQ RUN Run the program! Forget the rest
STX L Clear input value (X=0)
STX H
STY YSAV Save Y for comparison
; Here we're trying to parse a new hex value
NEXTHEX LDA IN,Y Get character for hex test
EOR #$B0 Map digits to 0-9
CMP #9+1 Is it a decimal digit?
BCC DIG Yes!
ADC #$88 Map letter "A"-"F" to $FA-FF
CMP #$FA Hex letter?
BCC NOTHEX No! Character not hex
DIG ASL
ASL Hex digit to MSD of A
ASL
ASL
LDX #4 Shift count
HEXSHIFT ASL Hex digit left, MSB to carry
ROL L Rotate into LSD
ROL H Rotate into MSD's
DEX Done 4 shifts?
BNE HEXSHIFT No, loop
INY Advance text index
BNE NEXTHEX Always taken
NOTHEX CPY YSAV Was at least 1 hex digit given?
BEQ ESCAPE No! Ignore all, start from scratch
BIT MODE Test MODE byte
BVC NOTSTOR B6=0 is STOR, 1 is XAM or BLOCK XAM
; STOR mode, save LSD of new hex byte
LDA L LSD's of hex data
STA (STL,X) Store current 'store index'(X=0)
INC STL Increment store index.
BNE NEXTITEM No carry!
INC STH Add carry to 'store index' high
TONEXTITEM JMP NEXTITEM Get next command item.
;-------------------------------------------------------------------------
; RUN user's program from last opened location
;-------------------------------------------------------------------------
RUN JMP (XAML) Run user's program
;-------------------------------------------------------------------------
; We're not in Store mode
;-------------------------------------------------------------------------
NOTSTOR BMI XAMNEXT B7 = 0 for XAM, 1 for BLOCK XAM
; We're in XAM mode now
LDX #2 Copy 2 bytes
SETADR LDA L-1,X Copy hex data to
STA STL-1,X 'store index'
STA XAML-1,X and to 'XAM index'
DEX Next of 2 bytes
BNE SETADR Loop unless X = 0
; Print address and data from this address, fall through next BNE.
NXTPRNT BNE PRDATA NE means no address to print
LDA #CR Print CR first
JSR ECHO
LDA XAMH Output high-order byte of address
JSR PRBYTE
LDA XAML Output low-order byte of address
JSR PRBYTE
LDA #":" Print colon
JSR ECHO
PRDATA LDA #" " Print space
JSR ECHO
LDA (XAML,X) Get data from address (X=0)
JSR PRBYTE Output it in hex format
XAMNEXT STX MODE 0 -> MODE (XAM mode).
LDA XAML See if there's more to print
CMP L
LDA XAMH
SBC H
BCS TONEXTITEM Not less! No more data to output
INC XAML Increment 'examine index'
BNE MOD8CHK No carry!
INC XAMH
MOD8CHK LDA XAML If address MOD 8 = 0 start new line
AND #00.0111
BPL NXTPRNT Always taken.
;-------------------------------------------------------------------------
; Subroutine to print a byte in A in hex form (destructive)
;-------------------------------------------------------------------------
PRBYTE PHA Save A for LSD
LSR
LSR
LSR MSD to LSD position
LSR
JSR PRHEX Output hex digit
PLA Restore A
; Fall through to print hex routine
;-------------------------------------------------------------------------
; Subroutine to print a hexadecimal digit
;-------------------------------------------------------------------------
PRHEX AND #00.1111 Mask LSD for hex print
ORA #"0" Add "0"
CMP #"9"+1 Is it a decimal digit?
BCC ECHO Yes! output it
ADC #6 Add offset for letter A-F
; Fall through to print routine
;-------------------------------------------------------------------------
; Subroutine to print a character to the terminal
;-------------------------------------------------------------------------
ECHO BIT DSP DA bit (B7) cleared yet?
BMI ECHO No! Wait for display ready
STA DSP Output character. Sets DA
RTS
;-------------------------------------------------------------------------
; Vector area
;-------------------------------------------------------------------------
.DA $0000 Unused, what a pity
NMI_VEC .DA $0F00 NMI vector
RESET_VEC .DA RESET RESET vector
IRQ_VEC .DA $0000 IRQ vector
;-------------------------------------------------------------------------
.LI OFF
The Cassette Interface
C100:A9 AA 20 EF FF A9 8D 20
C108:EF FF A0 FF C8 AD 11 D0
C110:10 FB AD 10 D0 99 00 02
C118:20 EF FF C9 9B F0 E1 C9
C120:8D D0 E9 A2 FF A9 00 85
C128:24 85 25 85 26 85 27 E8
C130:BD 00 02 C9 D2 F0 56 C9
C138:D7 F0 35 C9 AE F0 27 C9
C140:8D F0 20 C9 A0 F0 E8 49
C148:B0 C9 0A 90 06 69 88 C9
C150:FA 90 AD 0A 0A 0A 0A A0
C158:04 0A 26 24 26 25 88 D0
C160:F8 F0 CC 4C 1A FF A5 24
C168:85 26 A5 25 85 27 B0 BF
C170:A9 40 20 CC C1 88 A2 00
C178:A1 26 A2 10 0A 20 DB C1
C180:D0 FA 20 F1 C1 A0 1E 90
C188:EC A6 28 B0 98 20 BC C1
C190:A9 16 20 CC C1 20 BC C1
C198:A0 1F 20 BF C1 B0 F9 20
C1A0:BF C1 A0 3A A2 08 48 20
C1A8:BC C1 68 2A A0 39 CA D0
C1B0:F5 81 26 20 F1 C1 A0 35
C1B8:90 EA B0 CD 20 BF C1 88
C1C0:AD 81 C0 C5 29 F0 F8 85
C1C8:29 C0 80 60 86 28 A0 42
C1D0:20 E0 C1 D0 F9 69 FE B0
C1D8:F5 A0 1E 20 E0 C1 A0 2C
C1E0:88 D0 FD 90 05 A0 2F 88
C1E8:D0 FD BC 00 C0 A0 29 CA
C1F0:60 A5 26 C5 24 A5 27 E5
C1F8:25 E6 26 D0 02 E6 27 60
The Monitor
FF00: D8 58 A0 7F 8C 12 D0 A9
FF08: A7 8D 11 D0 8D 13 D0 C9
FF10: DF F0 13 C9 9B F0 03 C8
FF18: 10 0F A9 DC 20 EF FF A9
FF20: 8D 20 EF FF A0 01 88 30
FF28: F6 AD 11 D0 10 FB AD 10
FF30: D0 99 00 02 20 EF FF C9
FF38: 8D D0 D4 A0 FF A9 00 AA
FF40: 0A 85 2B C8 B9 00 02 C9
FF48: 8D F0 D4 C9 AE 90 F4 F0
FF50: F0 C9 BA F0 EB C9 D2 F0
FF58: 3B 86 28 86 29 84 2A B9
FF60: 00 02 49 B0 C9 0A 90 06
FF68: 69 88 C9 FA 90 11 0A 0A
FF70: 0A 0A A2 04 0A 26 28 26
FF78: 29 CA D0 F8 C8 D0 E0 C4
FF80: 2A F0 97 24 2B 50 10 A5
FF88: 28 81 26 E6 26 D0 B5 E6
FF90: 27 4C 44 FF 6C 24 00 30
FF98: 2B A2 02 B5 27 95 25 95
FFA0: 23 CA D0 F7 D0 14 A9 8D
FFA8: 20 EF FF A5 25 20 DC FF
FFB0: A5 24 20 DC FF A9 BA 20
FFB8: EF FF A9 A0 20 EF FF A1
FFC0: 24 20 DC FF 86 2B A5 24
FFC8: C5 28 A5 25 E5 29 B0 C1
FFD0: E6 24 D0 02 E6 25 A5 24
FFD8: 29 07 10 C8 48 4A 4A 4A
FFE0: 4A 20 E5 FF 68 29 0F 09
FFE8: B0 C9 BA 90 02 69 06 2C
FFF0: 12 D0 30 FB 8D 12 D0 60
FFF8: 00 00 00 0F 00 FF 00 00
Subscribe to:
Posts (Atom)